
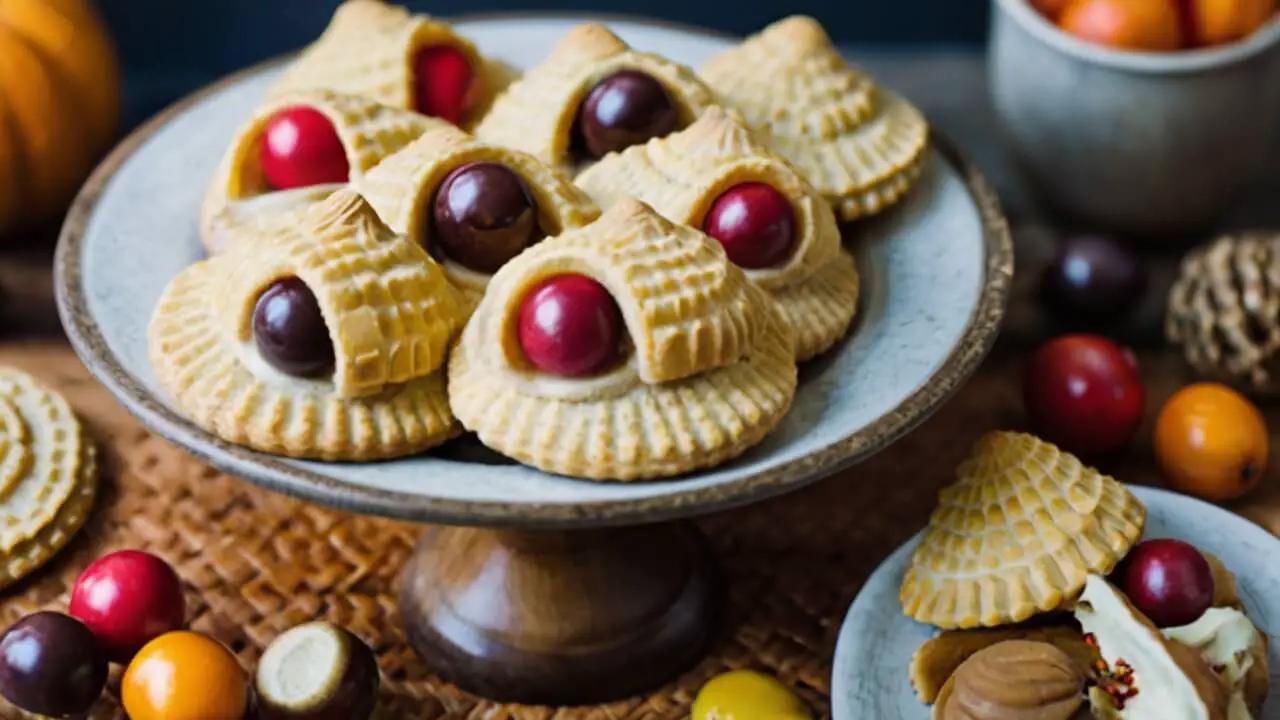
Thanksgiving is all about family, food, and fun. These Thanksgiving Cornucopia Cookies Recipe are perfect for celebrations. They look amazing and taste even better.
Kids and adults both love these festive treats. The cornucopia shape represents abundance and harvest blessings. You can make these cookies with simple ingredients.
They’re easier than you might think to create. This Thanksgiving Cornucopia Cookies Recipe will impress your guests. Plus, they make wonderful edible decorations for your table.
Let me show you how to make these beautiful cookies. You’ll be making them every year from now on.
When I First Discovered Thanksgiving Cornucopia Cookies
I first saw these cookies at a friend’s party. They were shaped like little horns of plenty. Colorful candies spilled out from the cookie cones. Everyone at the party wanted to know the recipe.
My friend showed me how simple they actually were. I couldn’t believe something so pretty was so easy. The next Thanksgiving, I made them for my family.
They were gone within minutes of being served. Now this Thanksgiving Cornucopia Cookies Recipe is my tradition. I make them every year without fail.

Equipment List
You need basic kitchen tools for this recipe. Here’s what to gather before you start:
- Large mixing bowl
- Electric mixer or whisk
- Rolling pin
- Baking sheets
- Parchment paper
- Cookie cutters (optional)
- Cooling rack
- Small bowl for egg wash
- Pastry brush
Ingredients You Need for Thanksgiving Cornucopia Cookies
- 2 cups all-purpose flour
- 1/2 cup butter (softened)
- 1/2 cup sugar
- 1 egg
- 1 teaspoon vanilla extract
- 1/2 teaspoon baking powder
- 1/4 teaspoon salt
- 1 egg (beaten for wash)
- Colorful candies (like M&Ms or Skittles)
- Small pretzels or chocolate pieces
- Optional: orange food coloring
Step-by-Step Guide
- Mix butter and sugar until light and fluffy.
- Add the egg and vanilla extract next.
- Beat everything together well.
- In another bowl, combine flour, baking powder, and salt.
- Slowly add dry ingredients to wet ingredients.
- Mix until dough forms completely.
- Wrap dough in plastic wrap tightly.
- Refrigerate for at least 30 minutes before using.
- Preheat your oven to 350°F (175°C).
- Roll dough on a floured surface until thin.
- Cut circles about 4 inches in diameter.
- You can use a bowl as template.
- Wrap each circle around a cone-shaped mold.
- You can make foil cones if needed.
- Seal edges with a little water.
- Brush with beaten egg for golden color.
- Place cookies on parchment-lined baking sheets carefully.
- Leave space between each cookie for spreading.
- Bake for 12-15 minutes until golden brown.
- Watch them closely to prevent burning.
- Remove from oven when edges turn golden.
- Let cool for 5 minutes on the sheet.
- Transfer to cooling rack very gently.
- Once cookies are completely cool, fill them carefully.
- Use colorful candies that represent harvest abundance.
- Push candies gently into the cone opening.
- Let some spill out for realistic effect.
- You can use mini pretzels as decorative accents.
- Add chocolate pieces if you like extra sweetness.
Tips to Make the Best Thanksgiving Cornucopia Cookies
- Chill your dough well before rolling it out.
- This prevents cookies from spreading too much while baking.
- Use parchment paper to avoid sticking problems completely.
- Work quickly when shaping to keep dough cold.
- Make foil cones ahead of time for efficiency.
- Brush egg wash generously for beautiful golden color.
- Let cookies cool completely before removing from molds.
- Store unfilled cookies in airtight containers for freshness.
- Fill cookies just before serving for best results.
- Get creative with your candy filling choices.
FAQs about Thanksgiving Cornucopia Cookies
Q: Can I make the dough ahead of time?
A: Yes, you can make it three days early. Keep dough wrapped tightly in the refrigerator always.
Q: What if I don’t have cone molds?
A: Make cones from aluminum foil instead easily. Roll foil into tight cone shapes for baking.
Q: How long do these cookies stay fresh?
A: Unfilled cookies last five days in airtight containers. Fill them just before you plan to serve.
Q: Can I freeze these cookies for later?
A: Yes, freeze unfilled cookies for one month maximum. Thaw completely before filling and decorating them.
Q: What candies work best for filling?
A: M&Ms, Skittles, and small chocolates work perfectly. Choose colorful options that represent autumn harvest beautifully.
Final Thoughts
This Thanksgiving Cornucopia Cookies Recipe brings joy to holidays. They’re fun to make with family and friends. Kids especially love helping with the decorating part.
These cookies make beautiful centerpieces for your dessert table. They taste delicious and look absolutely stunning together.
The ingredients for Thanksgiving Cornucopia Cookies are simple pantry staples. Learning how to make Thanksgiving Cornucopia Cookies is easy.
You’ll master this recipe after making it once. Share these special cookies with everyone you love.
More Amazing Recipes
- Pineapple Ice Cream Recipe
- Oven Baked Boneless Skinless Chicken Thighs Recipe
- Pepperoni Pizza Quesadilla Recipe
- Apple Fritter Bread Recipe

Thanksgiving Cornucopia Cookies Recipe
Equipment
- Large mixing bowl
- Electric mixer or whisk
- Rolling Pin
- Baking sheets
- Parchment paper
- Cookie cutters (optional)
- Cooling rack
- Small bowl for egg wash
- Pastry brush
Ingredients
- 2 cups all-purpose flour
- 1/2 cup butter softened
- 1/2 cup sugar
- 1 egg
- 1 teaspoon vanilla extract
- 1/2 teaspoon baking powder
- 1/4 teaspoon salt
- 1 egg beaten for wash
- Colorful candies like M&Ms or Skittles
- Small pretzels or chocolate pieces
- Optional: orange food coloring
Instructions
- Mix butter and sugar until light and fluffy.
- Add the egg and vanilla extract next.
- Beat everything together well.
- In another bowl, combine flour, baking powder, and salt.
- Slowly add dry ingredients to wet ingredients.
- Mix until dough forms completely.
- Wrap dough in plastic wrap tightly.
- Refrigerate for at least 30 minutes before using.
- Preheat your oven to 350°F (175°C).
- Roll dough on a floured surface until thin.
- Cut circles about 4 inches in diameter.
- You can use a bowl as template.
- Wrap each circle around a cone-shaped mold.
- You can make foil cones if needed.
- Seal edges with a little water.
- Brush with beaten egg for golden color.
- Place cookies on parchment-lined baking sheets carefully.
- Leave space between each cookie for spreading.
- Bake for 12-15 minutes until golden brown.
- Watch them closely to prevent burning.
- Remove from oven when edges turn golden.
- Let cool for 5 minutes on the sheet.
- Transfer to cooling rack very gently.
- Once cookies are completely cool, fill them carefully.
- Use colorful candies that represent harvest abundance.
- Push candies gently into the cone opening.
- Let some spill out for realistic effect.
- You can use mini pretzels as decorative accents.
- Add chocolate pieces if you like extra sweetness.
Notes
- Chill your dough well before rolling it out.
- This prevents cookies from spreading too much while baking.
- Use parchment paper to avoid sticking problems completely.
- Work quickly when shaping to keep dough cold.
- Make foil cones ahead of time for efficiency.
- Brush egg wash generously for beautiful golden color.
- Let cookies cool completely before removing from molds.
- Store unfilled cookies in airtight containers for freshness.
- Fill cookies just before serving for best results.
- Get creative with your candy filling choices.